Showing posts with label recipes. Show all posts

Saturday, June 21, 2014

Wheat Bread Recipe- Healthy, Easy and Cheap

I love feeding my family healthy foods but it can definitely get pretty expensive so I try to find ways to save where I can without compromising nutrition.
 
One way I have done that is by making my own sandwich bread. Before I started doing this I was easily spending $3 to $4 on one loaf of healthy bread and with three kids to feed I was using at least two loaves a week. Yikes!
 
I decided that I was throwing away too much money and pulled out my trusty bread machine to see if I could make my own sandwich bread and guess what? I was actually able to make a loaf that my kids loved to the point where they didn't even miss the store bought stuff.


I have since tweaked the original recipe to make it more healthy and am still very satisfied with how well it comes out- it is downright tasty and is cheap to make even with using better ingredients. Plus, since I use the bread machine it only takes me a few minutes of hands on time to make it which is so helpful considering that I work part time now.


Here is my recipe:

1 cup and 2 tablespoons warm water
3 tablespoons sunflower oil (I've also used canola, coconut and olive oil with great results)
3 tablespoons sugar (I use coconut or sucanat)
1 1/2 teaspoons sea salt
1 1/2 cups unbleached all purpose flour (or white whole wheat flour)
1 1/2 cups whole wheat flour
1 1/2 teaspoons yeast

Place ingredients in pan of your bread machine in the order called for by the manufacturer (I add water, sugar, oil, salt then flour and put the yeast on top). Choose bread machine setting- when I use instant yeast I choose the whole wheat quick cycle and when I use active dry yeast I choose the regular whole wheat cycle (I have a Zojirushi machine). Every brand of bread machine seems to be different, so it may take a few times to find the perfect setting to cook your loaf.

Once bread is done, let cool on a wire rack. When completely cooled, slice with a bread knife (I have found that cutting cooled bread has better results than warm bread and definitely use a bread knife to get even results).

Tuesday, March 4, 2014

Eggplant "Meat" Balls- Gluten Free and Oh So Good!

this was all that was left
I have found a recipe that I love that is not only delicious but also healthy.

Eggplant "Meat" Balls. They are so good in fact that I only had two bites of chicken at dinner and ate them instead- if I can find more recipes that taste this good sans meat I may just become a vegetarian.

I originally found the recipe at Connoisseurus Veg but adapted it to a vegetarian version.

1 large eggplant, peeled and cut into 1/2 pieces
3 tablespoons olive oil
1 medium onion, diced
3 garlic cloves, minced
1 large egg
1 tablespoon Italian Seasoning
1/4 cup grated Parmesan cheese (I am dairy free but Parmesan cheese doesn't bother me)
1 cup bread crumbs (I used gluten free oatmeal)

Salt the eggplant and let sit for 30 minutes. Heat 2 tablespoons olive oil in a skillet over medium heat and then add the diced onions. Saute until onions are translucent and then add the minced garlic. Once garlic is fragrant (after about a minute) add the eggplant and cook until soft, about 15 minutes.

Once eggplant mixture has cooled, add to a mixing bowl along with the egg, Italian seasoning, Parmesan cheese and bread crumbs. Mix well and then shape into balls (I made mine about 1 inch). Coat a cast iron skillet with remaining 1 tablespoon olive oil (you can also use a baking sheet but the cast iron skillet makes a better crust) and arrange the eggplant balls. Cook for about 30 to 40 minutes, making sure to turn a few times so that all sides get a nice crust on them.

As I said before, these were delicious. My two year old gobbled them up (my older two would not try them) and my husband, the vegetable hater, even admitted they were pretty good. The only thing I will change next time is that I am going to try using gluten free breadcrumbs to see what the taste difference is. I feel like these "meat" balls will freeze very well which is awesome because this is one more recipe that I can make a big batch of.

I cannot wait until lunchtime to eat the leftovers, perhaps with some pasta sauce to dip them in. I am drooling.

Tuesday, February 25, 2014

Crispy Crunchy Oven Onion Rings

My new favorite snack is crunchy onions.

What are crunchy onions, you may ask?

Well, they are onions that are crunchy and they are delicious!

Here is the "recipe"...

one onion (I use regular old yellow onions- cheap and yummy)
cooking spray (I use gmo free canola oil)
kosher salt


Slice the onion as thin as possible. Separate the the rings and place in a single layer on a cookie sheet sprayed with cooking spray. Spray onions with cooking spray and then sprinkle with salt. Place in an oven and "cook" on the oven's lowest setting- mine is the keep warm setting but your oven may have something different. Leave in oven for 3-4 hours, or until golden brown.


I am telling you- these things are absolutely delicious! Yes, they take awhile in the oven but the wait is well worth it (even though I steal some onions out of the oven before they are fully done). They come out super crispy and have a little bit of a bite to them- they are a great replacement for chips and are way healthier (plus they are gluten free).

I think I'm going to have to start buying a bag of onions every week...

Tuesday, January 28, 2014

Best Black Beans Ever Recipe- Frugal, Healthy and Yum

On my menu plan I said that we were going to have black beans with our dinner last night but my lack of attention to detail nixed that.

I went to start making the beans at 5 pm only to realize that they needed almost 2 hours to cook. Oops.

I still made them though and right now they are in my fridge ready to be portioned out and frozen for quick side dishes and lunches.

I found the recipe for these in the January/February edition The Whole Deal, which is a booklet that Whole Foods puts out every month with recipes and coupons (my favorite part is the coupons). The recipe is called the Best Black Beans Ever.

1 lb black beans, soaked overnight in water and then rinsed and drained
6 dried bay leaves
4 cloves chopped garlic
1 bunch green onions, white and light green parts sliced and dark green parts thinly sliced
2 cups sauvignon blanc wine
3/4 tsp fine sea salt

Put soaked beans, bay leaves, garlic and white and light green onions into a big pot with 3 quarts of water (this is equal to 12 cups, I felt like this was too much so next time I will reduce it by 2-3 cups). I used a 6 quart dutch oven for this and it worked very well.

Bring to a boil and then reduce the heat to medium-low and cover and simmer for about 1 1/2 hours making sure to skim off any foam.

Near the end of the cooking time, simmer the wine in a small pot for about 15 minutes or until it has reduced to about one cup. Add the wine and salt to the bean pot and simmer uncovered for about 20 to 30 more minutes until the beans are soft and creamy. Take out the bay leaves and serve. You can add the dark green onions as a garnish, though I didn't because my beans were destined for the fridge and not the table.

So what do I think of "the best black beans ever"? They have great flavor and I feel like they will make a great addition to rice and salads- even tacos would benefit from adding these. The recipe was super easy to make though next time I may try using chicken stock instead of the wine to see how the beans turn out.

Thursday, January 23, 2014

A Gluten Free Cookie That's Awesome

I had a major craving for chocolate the other day- more specifically for chocolate baked goods.

The thing about my craving was that I don't keep store bought cookies in my house and most certainly do not keep pre-made cookie mixes in my house- if I want sweets I have to make them myself from scratch. Usually when I get a craving I am far too lazy to go about making something but this particular day the pull of chocolate was too much.

I actually love it not being simple to make cookies and cakes because it keeps sweets as a special treat. I can only eat them when I have time to make them and with three kids in the house I barely have time to get the basics done. So, cookies, cakes and other sweets are not a part of our regular diet.

That is all swell, but now throw into the mix that I am gluten and dairy free due to health reasons. I can't just make up a batch of my tried and true chocolate chip cookies like the olden days, now I have to scour the Internet for gluten/dairy free recipes and then pray that they turn out well.

The other day, my chocolate craving led me to a recipe for Gluten Free Chocolate Crinkle Cookies. These are in no way, shape or form a health food but they are delicious and don't contain anything that will make me sick. I have recently cut sugar out of my diet but do allow myself to "cheat" sometimes because sometimes you need a little sugar in your life (at least I do).

These cookies honestly taste just as good as regular gluten laden chocolate crinkle cookies; my kids loved them but were only allowed to have one each as these cookies were for me (hey, at least I let them have one- I could have hoarded all of the cookies for myself).

So right now I am one happy gal- I am eating some yummy cookies and have yet another winning gluten free recipe to add to my repertoire.

Thursday, January 16, 2014

Quinoa Pilaf- So Flipping Good!

I finally made the recipe I have been to try- Quinoa Pilaf with Herbs and Lemon (from the January 2014 issue of Cook's Illustrated Magazine).

It came out really good. I have never had quinoa before (unless you count quinoa pasta) and honestly thought it was going to taste bad because quinoa reminds me of couscous and I hate couscous.

And you know what? It was so easy to make. Tonight my husband got home late form work and I had to cook the kids a dinner and then make another dinner for when he got home- I was still able to pull of making the quinoa while in the midst of making a billion (maybe not quite a billion) other things.

Quinoa Pilaf with Herbs and Lemon

Note: If you bought un-washed quinoa you need to wash it first. Use a fine mesh strainer or a rice strainer to do so. A great tip from Cook's Illustrated is to spread the washed quinoa on a rime baking sheet lined with a kitchen towel and let it dry for about 15 minutes. I love the genius tips they give!

1 1/2 cups pre washed quinoa
2 tablespoons unsalted butter cut into two pieces (I used Earth Balance dairy free spread)
1 small onion chopped fine (I used chopped onion from my freezer because I ran out of fresh)
3/4 teaspoon salt
1 3/4 cups water (yep, no chicken broth in this recipe and it tastes amazing)
3 tablespoons chopped herbs (soft herbs such as cilantro, parsley, chives, mint, tarragon)
1 tablespoon lemon juice

Toast the quinoa in a medium sized saucepan over medium- high heat. Stir frequently and cook until the quinoa is very fragrant and is making a continuous popping sound which is about five to seven minutes. Put the qunioa into a bowl and set aside.

Take the pan and put on medium-low heat; add the butter and melt. Once the butter is melted add the chopped onion and salt; stir frequently until the onions are softened and have turned a light golden color which takes about five to seven minutes.

Turn the heat up to medium-high and add the water and quinoa; bring to a simmer. Cover, reduce the heat to low and simmer for about 18 to 20 minutes, stirring halfway through. Quinoa is done when the grains are just tender and all liquid has been absorbed. Remove the pan from the heat and let sit covered for 10 minutes. Fluff the quinoa with a fork, stir in herbs and lemon juice.

Thursday, January 9, 2014

Kale Chips!

Since I am going to be ditching my beloved tortilla chips in an effort to get myself as healthy as I can be, I decided that I need to find a new crunchy snack.

That is where the kale comes in. I know, I know, how could a green leafy vegetable possibly be able to take the spot of chips? Pretty easily, actually!

Here is how you make delicious kale chips...

Break off the kale leaves from the stalk and then break them into bite size pieces. You can use kitchen scissors or be like me and just use your fingers. Throw the pieces into a bowl and drizzle with olive oil. Mix up well and then add your seasoning- I added kosher salt and then mixed it all up again to disperse the salt evenly. Lay out the kale in a single layer on a cookie sheet (you can use parchment paper to line your sheet if you would like) and bake in a 350 degree oven for about 10 minutes. Keep an eye on it because you don't want it to burn, you just want it to become crispy. When the kale is done, take out of the oven and let it cool. Store in an airtight container.

See? It's super easy. What is also great is that kale is very healthy and is pretty cheap. The words "healthy" and "cheap" are music to my ears because this mama is on a budget.

Tuesday, January 7, 2014

Slow Roasted Pork Shoulder with Peach Sauce- Cheap and Good!

Last night we had an amazing dinner, thanks to my Cook's Illustrated Cookbook.

Bone in pork butt roast was on sale at Whole Foods for $1.49 a pound so when I saw that I immediately got out my cooking bible to see if I could find a great recipe to utilize the "cheap" meat. I found a recipe for Slow Roasted Pork Shoulder with Peach Sauce and thought it sounded delicious so off to the store I went to buy the roast.

It came out delicious- the roast had a bacon taste to it and my kids devoured it. The peach sauce was pretty good too but I think next time I will reduce the sauce a little more so it tastes a little more rich.

This recipe is a great example showing that knowing how to cook cheaper cuts of meat is imperative in saving money at the grocery store- inexpensive meat can taste just as delicious as more costly cuts but you just have to know how to prepare them.

Recipe is from the The Cook's Illustrated Cookbook: 2,000 Recipes from 20 Years of America's Most Trusted Cooking Magazine.

Ingredients

Pork Roast

6-8 lb bone in pork butt roast
1/3 cup kosher salt
1/3 cup packed light brown sugar
pepper

Peach Sauce

10 ounces frozen peaches cut into 1 inch chunks (you can use fresh if they are available- use 2 peaches and cut into 1/2 inch wedges)
2 cups dry white wine
1/2 cup sugar
1/4 cup plus one tablespoon unseasoned rice vinegar
2 sprigs fresh thyme (I use dried thyme- I forgot to buy fresh)
1 tablespoon whole grain mustard


Place roast fat side up. Cut a crosshatch pattern of slits in the fat about one inch from each other, making sure not to cut too deep into the actual meat. Combine the kosher salt and light brown sugar into a bowl and then take the mixture and rub it onto the entire roast, paying special attention to the area that you cut the slits in. Wrap the roast tightly with two layers of plastic wrap and place in the fridge (on a rimmed cookie sheet so that the meat juice doesn't get all over your fridge) for 12 to 24 hours. I left mine in the fridge for the full 24 hours.


Once "fridge time" is done, adjust our oven rack to the lowest position and preheat the oven to 325 degrees. Unwrap the roast and brush off any excess salt/sugar mixture and then season the entire roast with pepper. For this recipe you need to use a large roasting pan with a v-rack. Spray the v-rack with cooking spray and place the roast on it. Then add at least four cups of water to the pan- I actually should have added more water because the four cups was not enough (my roasting pan is huge).


Place the roast in the preheated oven and cook for 5 to 6 hours making sure to baste twice during the cooking process. I don't have a baster so I just used a good old spoon to pour the drippings over it. You want to cook your roast until the meat is very tender and a meat thermometer reads 190 degrees near (but not touching) the bone. Once done cooking, transfer the roast to a carving board and loosely tent it with aluminum foil; let the roast rest for one hour (I had to let mine rest for 1.5 hours because my husband was late getting home from work- it came out super tender and was still nice and warm).

Transfer liquid from roasting pan into a fat separator and let stand for five minutes. I do not own a fat separator so I let the liquid stand for a lot longer and did my best to spoon off as much fat as I could- not the best way but it worked well enough. Keep 1/4 cup of the de-fatted liquid (jus) and discard the rest or save for some other purpose.


To make the sauce- bring the peaches, wine, sugar, 1/4 cup of rice vinegar, 1/4 cup of jus and thyme sprigs to a simmer in a small saucepan. As you can see, I did not have thyme sprigs so I rested a small strainer in the pan and poured some dried thyme in it. Simmer mixture, making sure to stir occasionally, for about 30 minutes until it has reduced to about 2 cups. Remove the thyme and add the 1 tablespoon of mustard and 1 tablespoon of vinegar.


To debone the roast, cut around the bone with a paring knife until it can be pulled free from the roast- as you can tell I did not do this very neatly but in the end, it still tasted good! Use a serrated knife to slice your roast. Pass the sauce separately.


Disclaimer: This post contains my affiliate link.

Thursday, October 3, 2013

Homemade Cream of Mushroom Soup- So Simple and Good!

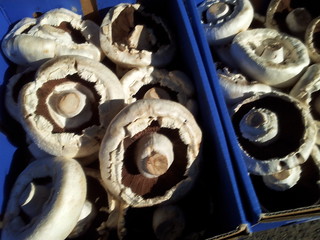
Mushrooms
photo credit
I prefer to make as much from scratch as possible and to avoid processed foods (I say prefer because I am not perfect and do buy some "boxed" stuff, though I make sure to buy organic) so when I come across a new recipe that allows me to do this I get super excited.

My excitement this time is about cream of mushroom soup. You see, my husband loves tuna casserole and one of the main ingredients is cream of mushroom soup. There was a time that I thought buying a can of it was the only way but then I started doing some research and realized that it is in fact possible to make your own!

How awesome is that- you can ditch buying a can of processed soup that contains questionable ingredients with just a few simple steps. No more being a slave to the grocery store; make up a big batch and freeze some so that you always have some on hand!

When I made tuna casserole the other night I tired out this cream of mushroom soup recipe from Wholesome Mommy. It came out really good- I mean really, really good!

4 oz. Fresh White Mushrooms (stems removed), sliced thin
2 tablespoons butter (use real butter- it's way better than the fake stuff)
2 tablespoons flour
1 cup Beef Broth (I used my homemade beef stock)
1 cup Heavy Cream (she used half and half but I think heavy cream gives it a richer taste)
Salt to Taste

Melt butter on medium low heat in pan. Add mushrooms and sauté until soft and then add the flour. Mix well with mushrooms/butter. Add the beef stock and heavy cream and mix well. Turn heat to medium and boil soup until it's at the desired consistency, making sure to stir often.

If you have a husband who hates mushrooms, you can at this point strain the soup (yes, I know it is weird that he will eat cream of mushroom soup in a tuna casserole but act like he is going to barf if he comes in contact with an actual mushroom).

If you want to make a tuna casserole with your new found ability to make cream of mushroom soup, it's pretty darn easy!

Pour your cream of mushroom soup into a casserole dish. Add about 1 1/2 cups cooked noodles (more or less depending on how noodle-ly you want your dish) and a can of drained tuna. Mix it all up and put the cover on the casserole dish. Cook for about 30 minutes in an oven preheated to 325 degrees, stirring occasionally (or more than occasionally if you are like me and do not want any crispy bits).

This was the best tuna casserole I have ever made- my husband loved it and I even like it which is saying a lot because I hate tuna casserole!

Homemade Beef Stock- You'll Never Use Store Bought Again!

The other day I did something that I have been wanting to do for a long time- I made my own beef stock.


I've made homemade chicken more times than I can count but beef stock has always kind of scared me. The main ingredient is beef bones and those are not things that I keep on hand (unlike chicken carcasses which are always aplenty in my chest freezer).

When I actually looked into making beef stock it really didn't seem that bad, so I headed to Whole Foods and bought some beef bones (they always have them stocked) and also a beef shank which was recommended by the guy at the meat counter.

I used this recipe and was majorly wowed by how good the stock came out. If you are used to using store bought then making your own will knock your socks off with how rich it tastes- I can't even think of one brand of store bought even comes close.


I ended up getting thirteen cups of beef stock from three beef bones and one beef shank plus miscellaneous vegetables (most were scraps that I have been saving in my freezer)- twelve cups are residing in my freezer as we speak and one cup was used to make homemade cream of mushroom soup (I will post about that another day- it is a can't miss recipe).

So now, just like I refuse to buy chicken stock I will from this day on refuse to buy beef stock. Why buy something when you can make a superior tasting and more wholesome version at home?

Monday, September 30, 2013

Beef Stew- The Best Ever In The Whole World

It's fall and my all time favorite meal for chilly days is beef stew. I have literally been drooling of the thought of making beef stew all summer- yes, I could have made it during the summer but I was too busy grilling (because grilling equals way less after dinner clean up).

So, today I made beef stew. I ended up making it right after lunch because I had to take my dog to the vet for an ongoing skin issue he is having and the only appointment they had available for today was 5 pm. This really is a great make ahead meal; you can even make it up to three days in advance. I really wish I made a double batch though so I could have frozen some for quick dinners/lunches but the pot was empty when dinner was over.

Here is the best beef stew I have ever made or eaten in the thirty years I have been alive, and I am in no way exaggerating.


Old Fashioned Beef Stew (from The Cook's Illustrated Cookbook)

3 lb boneless beef chuck eye roast- trimmed and cut into 1 1/2 in pieces
   *do not use stew meat. Buying a chuck roast with good marbling of fat gives you a consistent flavor
     and texture, as well as the fact that you will have more constant sizing of the pieces when you cut
     them yourself.
3 tablespoons oil (calls for vegetable but I used organic canola)
2 onions coarsely chopped (I only used one large onion)
3 minced garlic cloves
3 tablespoons all purpose flour
1 cup red wine (Cabernet Sauvignon is recommended and is what I used)
2 cups low sodium chicken stock (I used homemade- cheap and yummy)
2 bay leaves
1 teaspoon dried thyme
1 pound red potatoes, peeled and cut into cubes
4 large carrots peeled and sliced 1/4 inch thick (I used baby carrots and cut them into four pieces)
1 cup thawed frozen peas (omitted this and did not miss it in the final product)
1/4 cup minced fresh parsley (omitted this because I forgot to buy it)

Preheat oven to 300 degrees.

Season the beef with 1 1/2 teaspoons salt and 1 teaspoon pepper- toss to evenly coat all pieces.
Heat 2 tablespoons of the oil on medium high in a dutch oven; brown meat on all sides in 2 batches, adding one more tablespoon of oil if needed. Set the beef aside and add the onion to the pot and cook until almost softened. Reduce the heat to medium and add the minced garlic, cooking until it becomes fragrant (about 30 seconds). Stir in the flour and cook until the mixture has lightly browned and then add the wine. Scrape any brown bits off of the bottom of the pan and then add the chicken broth, bay leaves and thyme. Bring to a simmer, add the meat and then bring to a simmer again. Put the cover on the dutch oven (you want a super tight fit so a great tip is to first put aluminum foil over the dutch oven and then put the lid on) and then place into the preheated oven for 1 hour.

Take the pot from the oven and add the carrots and potatoes (if you want to prep the potatoes when you are prepping the ingredients for the first phase of the recipe, you can store the potatoes in a bowl of cold water to prevent them from browning). Cover the pot and return to the oven for another hour. If you are cooking this ahead of time then you can let the stew cool and refrigerate for up to three days. If not, stir in the thawed peas and let stand for five minutes. Then mix in the parsley and season with salt and pepper to taste (I forgot to add salt and pepper and it was still delicious- I am such a scatterbrain). At this point, the stew can be refrigerated for up to two days if need be, otherwise serve it to your family and watch them scarf it up!


As I said earlier- this is the best beef stew I have ever had. The broth was awesome- I do not even understand how wine and chicken broth came out tasting how it did but it was like magic. The beef was so tender that it pretty much melted in your mouth. Next time I will make a double batch because I am craving a bowl right now but it's a little late to make stew and I don't have any beef left  : )

Disclaimer: This post contains my affiliate link.

Wednesday, November 21, 2012

Corn Muffins That Don't Suck

obligatory turkey decoration
photo credit
My son had a feast at school today and instead of being lazy and volunteering to send in popcorn I decided to make corn muffins. The only corn muffins I have ever made were the Jiffy ones that you buy the mix for- they were dry and gross. Boxed mixes suck- homemade is always way better.

Now, I am no Martha Stewart- so when I need a recipe I consult cook books and the good old Internet. I found this recipe that had good ratings on All Recipes (my favorite recipe site- the only one other than Cook's Illustrated that I ever use).

These muffins came out delicious and I will most definitely be keeping the recipe in my arsenal to use in the future. One issue with the recipe is that it calls for buttermilk; if you are like me your local grocery store may not carry this ingredient but that issue is easily solved. To make one cup of buttermilk pour one tablespoon of vinegar or lemon juice (I squeezed a fresh lemon because I couldn't find lemon juice in the totally crowded store) and then fill the measuring cup with enough milk to equal one cup. Let it sit for five minutes and you have your very own homemade (and frugal) buttermilk to make these muffins or anything else your heart desires.

Corn muffins- yum!

Sunday, November 11, 2012

Pizzelles!

As long as I can remember my mom has made pizzelles for holidays. I always assumed they were complicated to make but you know what? They are so simple- you only need some basic ingredients, a pizzelle iron and some time.


3 eggs
3/4 cup white sugar
1/2 cup melted butter
1 tablespoon vanilla extract
1 3/4 cups all purpose flour
2 teaspoons baking powder


Beat the eggs and sugar until thick. Stir in the melted butter and vanilla extract. Add the sifted flour and baking soda; mix until batter is smooth.


Heat the pizzelle iron. Drop batter onto each circle on the iron- the amount of batter you use depends on the size of your iron. I used a little more than a teaspoon for each of my cookies and my iron is on the smaller side. Baking time also depends on your iron and the color you want your cookies to end up. Believe me, you'll hit pizzelle nirvana and start cranking out perfect cookies. Carefully remove cookies from the iron and let cool completely.

To fancy them up you can sprinkle powdered sugar on top. These make great gifts around the holidays too- people will think you're a baking genius.


My only qualms with making pizzelles is that they seem to disappear really fast because my family loves them so much. I definitely have to restrain myself because I can eat them just as fast as I can make them!

Recipe courtesy of All Recipes.

Disclaimer: This post contains my affiliate link.

Wednesday, November 7, 2012

The Best Bread Ever

photo credit
I wanted to make bread to go along with our dinner last night and wanted to try something new so I headed to my most favorite recipe spot- All Recipes.

I found this recipe for Italian Bread that could be made in the bread machine (I don't make bread unless I can use my bread machine) and let me tell you- it is the best bread I have ever made! It honestly tastes just as good as the Italian bread you get from the supermarket bakery and is way cheaper.

Now granted, the recipe is not 100% done in the bread machine. The machine makes the dough for you, which in my opinion is the most time consuming and pain in the butt part about making bread, but you have to shape the dough into a loaf, let it rise one more time and them bake it. But I promise you, the minimal work that you put into this bread will turn out in pure perfection.

My mouth is watering right now but I would suppose it is too late to make a loaf of bread :  (

Monday, August 13, 2012

Yummy Pancakes...

Fufu Flour
photo credit
I just made these pancakes for the kids and they loved them! To make them a smidge healthier I did half unbleached all purposed flour and half whole wheat flour.

I really wished that I made a double or triple batch because there are non leftover to freeze- It figures though. Whenever I made a huge batch of something the kids hate it and whenever I make a small batch they love it.

Saturday, June 30, 2012

Eggplant Parmesan

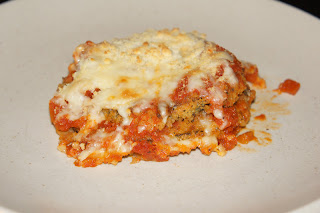
After eating eggplant croquettes and liking them, my husband asked if I could try making eggplant parmesan. I found a recipe for it from Cook's Illustrated which ended up being a bit involved but the results were fantastic. If you are looking for a recipe where you just dump some stuff in a dish this one is not for you but you really just seem to get better results the more time you but into something. 

As the Annoying Orange would say "hey eggplant... knife!"

Sweating it out...

Delicious!

My husband and I loved it (the kids were visiting my mom). The eggplant was cooked to perfection and the homemade sauce was very good (though there was a bitter aftertaste which I suspect is from me using dried basil instead of fresh). I will be making this again and I know when the kids try it they will gobble it right up like we did,

Friday, May 4, 2012

Big Batch O' Waffles

Today my son had no school because of parent-teacher conferences so no dragging three kids out of the house at 8:20 am for me (yeah!).

I had a terrible nights sleep because Jilly Billy has turned anti-crib but managed to still drag my butt out of bed a 7 am, mostly due to the fact that my kids were moaning that they were starving to death.

Something came over me and I decided to make a big old batch of waffles. I used this recipe which I've used before but this time I didn't make them dairy free but I did use half unbleached flour and half white whole wheat flour. I doubled it so that I would have lots to freeze for mornings where I'm not feeling so Martha Stewart like (which seems to be almost every morning).

Yeah for cooking huge amounts of stuff and then freezing it!

Tuesday, April 24, 2012

Homemade Chicken Stock "Recipe"

Here is my recipe for homemade chicken stock, though I wouldn't actually consider it a recipe because I basically just throw some stuff in a pot with no regards to such things as measurements.

First, throw all of your chicken carcasses and leftover veggies (carrots, onions, celery) into a large pot. If you don't have all of the veggies I listed, don't worry. Just use whatever of the three you may have or none at all, what really matters is the chicken. I also throw in a couple of bay leaves because they seem to make it taste a notch better. Fill the pot with enough water to over everything and bring to a simmer. The question of how long to simmer everything is really up to you- do it until the stock smells and tastes good. You can make it as potent as you want. The picture above was taken awhile ago- yesterday  when I made my stock I used two chicken carcasses so my pot was much fuller.

If you are going to be gone all day and still want homemade stock you can just throw everything into a slow cooker on the low setting. It still comes out great and if need be if the stock is not potent enough you can always reduce it in a pot after the straining process.

Once your stock has the desired flavor it's time to strain in. This is my straining contraption- I place a colander in a pot. Pretty high tech, huh? To make sure you strain all of the small bits out you can you cheesecloth (the best way to do it) or be ghetto like me and use paper towels (just make sure to change them often). Have a plastic bag handy for all of the scraps. Once the stock has been strained let it cool on the counter a bit and then place in the refrigerator to completely cool.

If for some reason you decide you want your stock to be more potent you can just simmer it on the stove until it has your desired taste. That is what is great about making it yourself- if you simmer down the store bought stuff it becomes way too salty because of all the salt they add to it.

Once cooled the stock will be jelly like; this is normal, though it looks kind of weird. When you heat it up it will turn back into a liquid which is good because I doubt my family would be into chicken jello. Skim any fat off of the top and your stock is ready to rumble!

When I make homemade chicken stock I portion it out into plastic containers and pop them into the freezer so that I have stock ready to use in recipes (I sometimes take the frozen stock portions and put them all into a large freezer bag). Today I ended up with eight cups of stock (a 3 cup portion, a two cup portion and three 1 cup portions) which was yielded from two chicken carcasses and a bevy of carrots, celery and onions (all leftovers from various food preps). You may end up with more or less depending on how many carcasses you have and how long you simmer your stock for.

I'm not sure how much eight cups of stock would cost in the store but this is some high quality stuff with no added weird ingredients- just water, chicken, carrots, celery, onions, and bay leaves (I don't add any salt to it until it get used in a recipe). Plus it was basically free because I used items to make it that would have normally been thrown out.

It is frugal and gourmet all rolled into one!

Wednesday, March 14, 2012

Simple Beef Chili

Last night for dinner I made Simple Beef Chili from The Cook's Illustrated Cookbook. Just like the name says, it was pretty simple to make but in spite of that simplicity the flavor was top notch.

Ingredients (serves 8 to 10):

2 tablespoons vegetable oil
2 onions, chopped fine
1 red bell pepper (sans stem and seeds) cut into 1/2 inch pieces
6 minced garlic cloves (I hate cutting garlic, more so than even onions)
1/4 cup chili powder
1 tablespoon ground cumin
2 teaspoons ground coriander
1 teaspoon red pepper flakes
1 teaspoon dried oregano
1/2 teaspoon cayenne pepper
2 lbs ground beef (recipe calls for 85% but I used 90%)
2 fifteen ounce cans red kidney beans (rinsed)
1 twenty-eight ounce can diced tomatoes
1 twenty-eight ounce can tomato puree
salt

Heat the vegetable oil in a Dutch oven over medium heat. Add the onions, bell pepper, garlic, chili powder, cumin, coriander, red pepper flakes, oregano and cayenne pepper and cook until the vegetables are softened and starting to turn brown (stir occasionally), about 10 minutes. I prepped the vegetables in the morning during some down time (meaning my kids were zombified by a movie and the baby was strapped to me in the baby carrier) and threw them into a plastic container along with all of the needed spices. When I was ready to start cooking later in the day I just had to toss the contents into the Dutch oven which made things a lot easier.

Turn heat to medium high and add half of the ground beef; break up the meat and cook until no longer pink. Add the rest of the ground beef and cook until no longer pink.

Add the beans, tomatoes, tomato puree and 1/2 teaspoon salt. Bring to a boil and then reduce the heat to low and simmer, covered, for one hour making sure to occasionally stir. After an hour, remove the cover of the Dutch oven and simmer for one more hour until the beef is tender and the chili has darkened in color and has slightly thickened. Season with salt as desired.

Yum, especially with a side of homemade bread (thank goodness for bread machines!). My husband isn't a chili kind of person so he really didn't eat much but that is his loss and my gain because I have a ton of chili in the refrigerator just waiting for me to scarf down today for lunch. If for some reason there is any left over after a couple of days then I'll freeze it so I can stuff my face at a later date.

Disclaimer: This post contains affiliate links.


Tuesday, March 13, 2012

Dairy Free Cinnamon Rolls

I had a hankering for something sweet today so I decided to make cinnamon rolls. I would die for cinnamon rolls, I love them so much, but rarely make them because of the time involved.

I came across Money Saving Mom's recipe for Bread Machine Cinnamon Rolls and thought that I would give it a try. Because my infant has a dairy allergy and I'm breastfeeding I substituted soy milk for regular milk and dairy free spread for the butter. I am weird and abhor frosting so I totally omitted that part.

The rolls came out delicious! Who knew that nasty soy milk could make something so good. As you can see from the picture I crowded the rolls to close together (I was in an epic battle to get my baby to fall asleep in her swing- I came out triumphant after twenty minutes of pacifier stuffing) so they popped up a bit so if you make these, don't do that.

Off I go to stuff my face with dairy free cinnamon rolls (yes, I will share some with the kids even though I don't want to).